

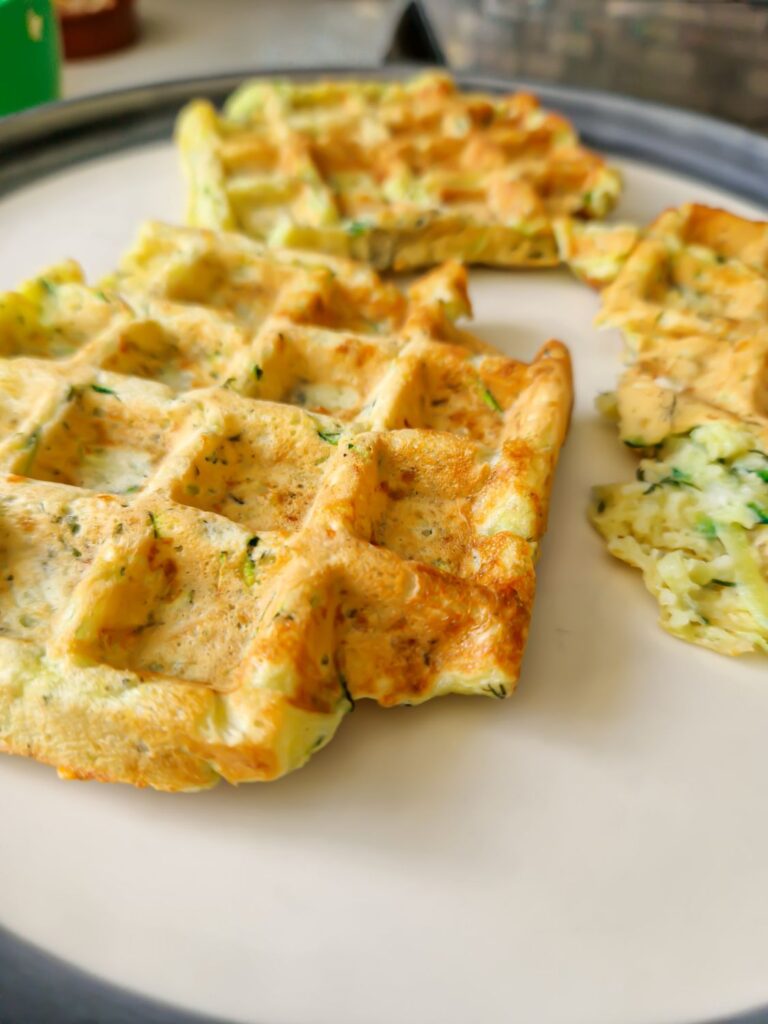
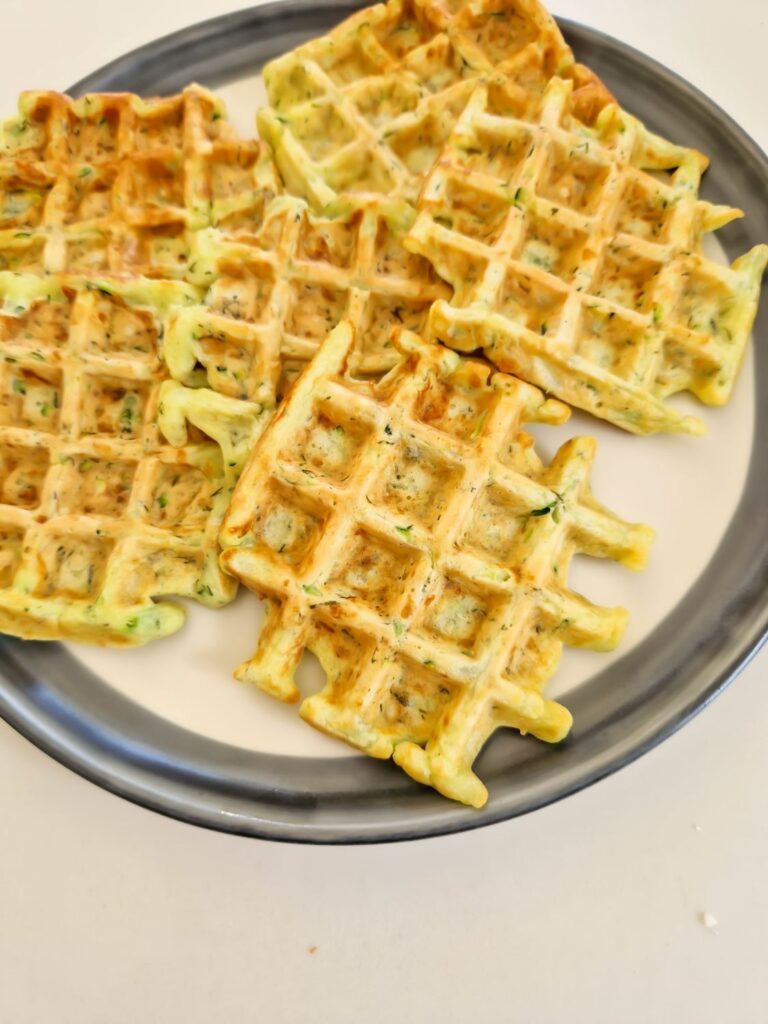
An easy, savoury twist on classic waffles – fluffy inside, golden outside, and bursting with fresh flavour.
Why you’ll love them
- Quick and easy – ready in just a few steps, no complicated prep
- No deep frying – they’re cooked in the waffle maker, no greasy mess
- Bold, fresh flavour – lots of garlic and dill, rich and savoury
- No draining needed – you use the whole zucchini, no waiting time
- Soft and satisfying – fluffy texture, yet packed with taste
This recipe checks all the boxes when you’re short on time but still want something homemade and full of flavour.
They’re perfect for breakfast, brunch, or even dinner with a salad. And that combo of zucchini, cheese, and dill? So fresh and delicious!
I often make them when I have leftover zucchini in the fridge and no desire to cook something complicated. They’re also great for kids (they won’t even notice the veggies), lunchboxes, or lazy brunches on weekends.
And if you’re in the mood for more savoury bites, these Spinach, Cheese, Onion and Garlic Muffins or Cheese and Carrot Muffins are just as easy and delicious – great for lunchboxes or snacks.
Ingredients for Zucchini, Cheese & Dill Waffles
-
1 medium zucchini (about 150 g), grated
-
2 large eggs
-
100 g hard cheese (I use feta)
-
200 g Greek yogurt (not plain yogurt – it’s too runny)
-
2 garlic cloves, finely grated or crushed
-
1 tsp baking powder
-
100 g all-purpose flour
-
1 tbsp finely chopped dill
- Freshly ground black pepper, to taste
How to make these Zucchini, Cheese & Dill Waffles:
-
Grate the zucchini, sprinkle with a bit of salt, and let it rest for 5–10 minutes. Then squeeze out the excess moisture using a clean kitchen towel or paper towels.
-
In a large bowl, whisk the eggs, then mix in the yogurt, grated garlic, cheese, dill and black pepper.
-
Add the grated zucchini (well-drained), then stir in the flour and baking powder until the mixture is smooth and thick.
-
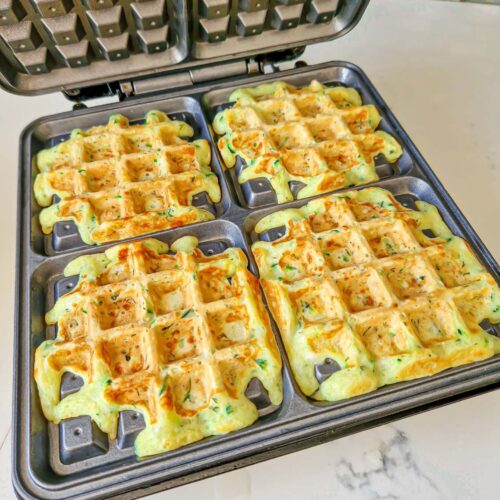
Preheat your waffle maker and lightly grease it if needed. Spoon in the batter and cook for 4–5 minutes, or until golden and firm to the touch.
-
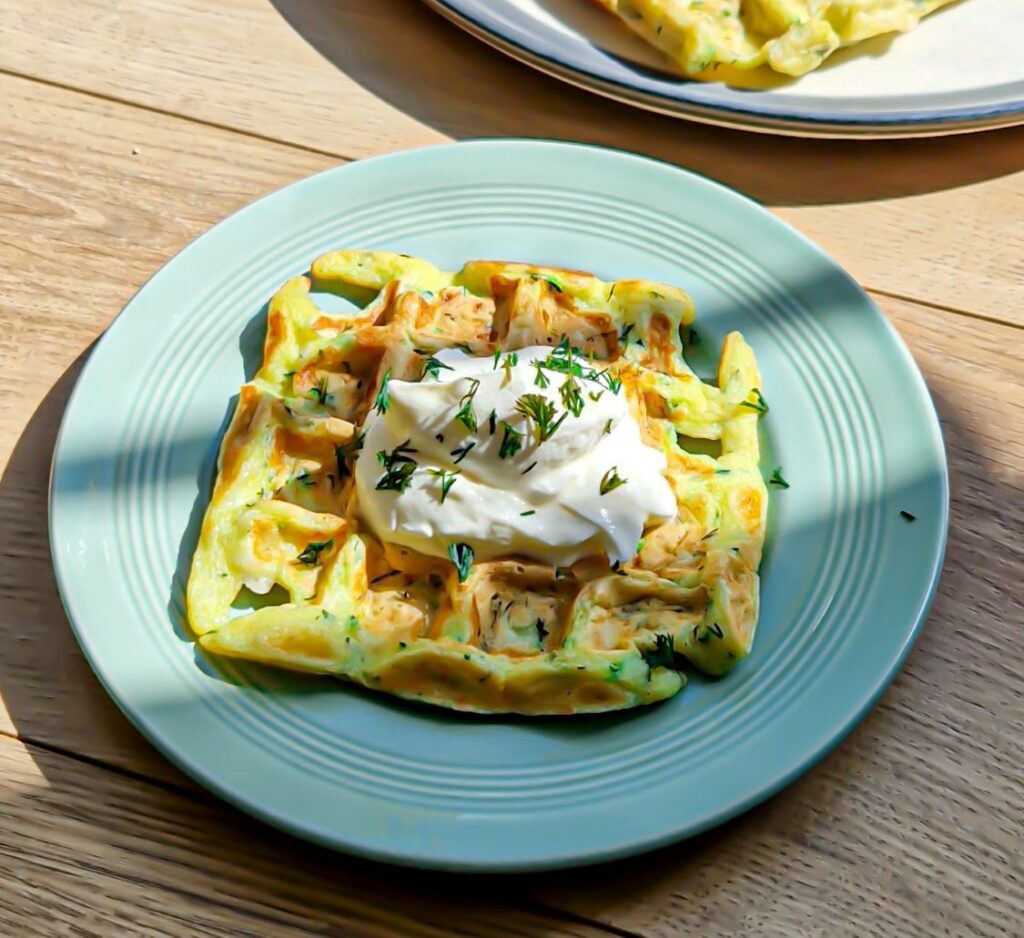
Serve warm, as they are or with a dollop of Greek yogurt or sour cream. I love them with a fresh tomato or cucumber salad on the side. You can even pair these waffles with a simple salad – something like this Quinoa Pomegranate Spinach Salad with a minty dressing adds a lovely fresh touch.
Tips & Serving Ideas:
-
These are great warm or cold, and perfect for packed lunches too.
-
You can swap dill with chives or parsley, depending on what you have.
-
If you want a touch of spice, add a pinch of chili flakes to the batter.
-
For extra crispiness, reheat them in a toaster the next day!
Craving carbs? Try my Rosemary Focaccia Bread – soft, fragrant, and great for dipping.
Or go bold and comforting with this Spicy Garlic Oil Pasta – fast, punchy and perfect for weeknights.
Zucchini, Cheese & Dill Waffles
Equipment
- Waffle maker
Ingredients
- 1 1 medium zucchini (about 150 g), grated
- 2 large eggs
- 100 g hard cheese (feta recommended)
- 200 g Greek yogurt (not plain yogurt)
- 2 garlic cloves, finely grated or crushed
- 1 tsp baking powder
- 100 g all-purpose flour
- 1 tbsp finely chopped dill
- Freshly ground black pepper, to taste
Instructions
- In a large bowl, grate the zucchini using the large holes of a grater.
- Add the grated cheese, eggs, garlic, and freshly ground black pepper. Mix well until fully combined.
- Add the Greek yogurt and chopped dill, then mix again until smooth.
- In a separate bowl, combine the flour and baking powder. Gradually incorporate this mixture into the wet ingredients in two batches, stirring well to avoid lumps.
- Preheat and lightly grease the waffle maker. Cook the batter until the waffles are golden and cooked through, about 4–5 minutes.
- Serve warm, optionally with Greek yogurt, sour cream, or a fresh salad.
Notes
Notes / Tips
- No need to drain zucchini before mixing — saves time and keeps flavor.
- Great warm or cold, perfect for packed lunches.
- Swap dill for parsley or chives if preferred.
- Add chili flakes for a spicy kick.
- Reheat leftovers in toaster or pan for crispiness.
I hope you enjoy making and savoring this delicious recipe as much as I do! If you’d like to explore more of my culinary adventures, feel free to follow me on my:
While I may be new to the scene, I’m driven by my passion for creating tasty dishes to share with others. Let’s cook and enjoy together!